Category Archives: our go-to recipes

I’d like to sip my cider.

It is hard, when the walnuts are cracking and rolling underfoot, and when the skies are one day so blue it hurts and the next like soft grey flannel, and when the leaves bank against the porch steps and the Virginia creeper goes ruby, not to get a little nostalgic. Are any of us immune?

walnut

I do miss things. I miss the crackle of the woodstove, and the pile of shoes drying out next to it, and the way my toddler learned to swing a hatchet at the woodpile under the watchful and loving tutelage of his father. I miss the dappled canopy of the walnut trees behind our house. I miss autumn potlucks, all kabocha squash and braised pork and cold beers. I miss the call of my goats from under the majestic old oak that stood sentinel on the hill, nodding its quiet reassurance north to where I was hanging laundry behind the house and west to the crew snipping winter squash from their vines. I miss the goats’ winter coats too, less shiny than their summer sheen and thick almost overnight with a cashmere undercoat. I miss the carpet of leaves and pine needles crunching underfoot on long walks through our woods with my child, and the moss and dirt under his fingernails as he plunged into the shallow creek in gleeful disregard of the growing chill. I miss the color of wild persimmons against an October sky, and our fire pit, and our fall carrots. I wonder how many leaves our young sugar maple, the one we planted up near the mailbox, put out this year.

fall carrots

wild persimmons

But it is also nigh on impossible to ignore fall up here in the Hudson Valley. It crept along quietly for awhile. Way back in early August I drove north along the Taconic to Rensselaer County and had to squint to be sure I was really seeing a few red leaves. One day in September I went to buy some corn for dinner at our local orchard’s farm store and half gallons of their first cider, pressed the night before, beckoned from an icy bin. When I drive to pick up my son from his preschool on Tuesday and Thursday afternoons, I am often stopping behind elementary school buses, and kids hop to the pavement under slow-motion showers of ochre leaves. Most mornings call for jeans and a sweater, but by noon we can still trade our slippers for sandals. It won’t be long, though, before we dig through the closets for our boots and winter hats.

bumble

seconds

tawny

But I’m in no rush. Last winter was extremely hard. And there’s no getting around it – the one that’s coming promises to be pretty intense as well (I’m working on another post about it all; I’ll share it as soon as I can). And so I’d like to just hit pause for a spell, thank you very much. I’d like to curl like a cat in the warm lap of these golden afternoons. I’d like to kick through the leaves with my son. I’d like to sip my cider and scratch my head as I figure out how to make his requested pink furry mouse costume with a complete lack of sewing skills. I’d like to eat more cider donuts.

ochre

kabochas

I will even take a month of todays. It was cold and wet. We slurped soup in a diner while, back home, the steady rain cleaved the gravel driveway into tiny canyons. We dried off while we bought our groceries and when we pushed the cart to the car the rain had tapered off to a sweet drizzle, but in the 90 seconds it took to return the cart something shifted up in the clouds. I was soaked through to my skin when I climbed back in the car. We sat in the parking lot for a while, chuckling and waiting for the rain to let up enough to drive home.

Later he woke from his nap and climbed onto the bed where I sat writing. I closed my computer and I put my empty mug on the windowsill. He climbed into my lap and rested his head against my growing belly. I grinned in unspeakable delight to realize my two children were nearly cheek to cheek, and the littlest one even gave a swift thump, but I didn’t say a word. These are the last months when he doesn’t have to share me.

Then we trudged through tall wet grass to the basement for a butternut squash, and over to the barn for some onions and garlic. He curled up on the couch to watch some excavator videos (“With a grapple, Mom, but no operator, okay?”). I made this soup. It is like a fresh pot of coffee, or a handwritten letter, or the Amélie soundtrack, which is to say: always perfect.

Winter Squash Soup with Curry and Coconut Milk
adapted from Better Homes and Gardens

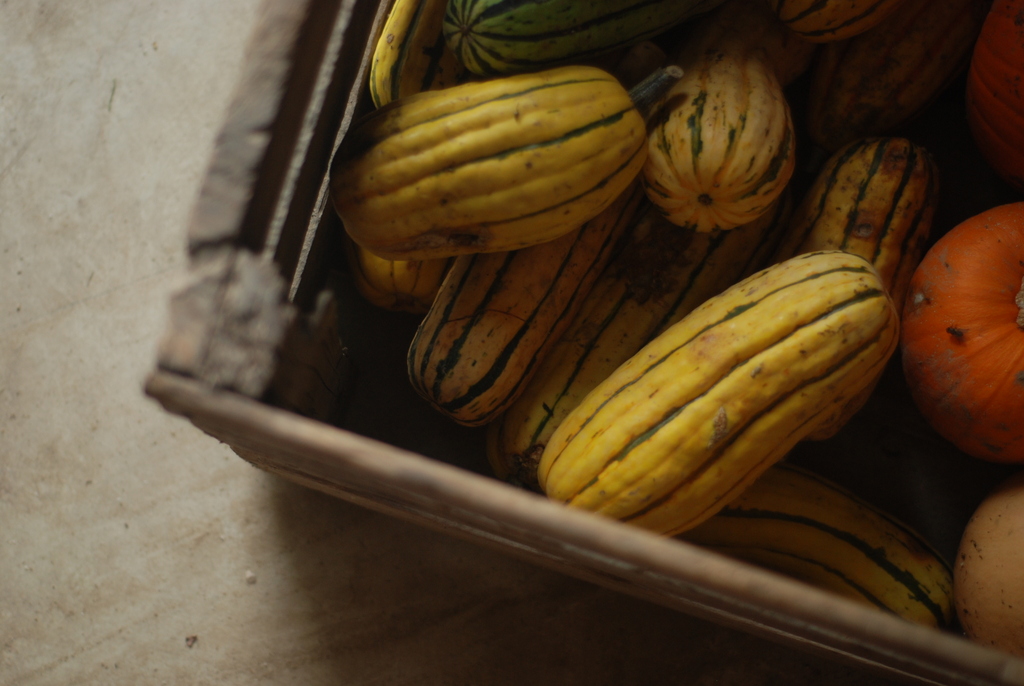
You can use almost any kind of winter squash here – butternut, kabocha, red kuri, hubbard, anything sweet and tender. I really like the little kick this soup gets from the chili sauce, but you can certainly leave it out if you like. If you’re making this early in the fall from local squash, there’s a chance your squash hasn’t fully cured yet. It will still work, but the sugars won’t be as concentrated, so you might want to add another tablespoon or two of sweetener – taste before serving and adjust as needed. Finally, if you have a low- or no-salt curry powder, you’ll need to salt this soup. Taste just before serving and add additional salt as needed.

1 medium or large onion, chopped
1-4 cloves garlic (depending on your feelings about garlic), minced
1 tablespoon curry powder
1 winter squash, about 2 pounds, peeled and cut into 1-inch cubes
1 14-oz can unsweetened coconut milk
2 cups chicken or vegetable broth
1 tablespoon brown sugar, whole cane sugar, or maple syrup
1 tablespoon fish sauce or soy sauce
1 teaspoon Asian chili sauce (like Sriracha) (optional but recommended)
1/2 cup red lentils (optional; these give the soup a nice protein boost and cook quickly, but I often leave them out)

Warm a couple tablespoons of olive oil, coconut oil, or the fat of your choice in a Dutch oven over medium heat. Add the onions and saute until they begin to soften, about five minutes. Add the garlic and cook another one to two minutes. Add the curry powder and saute a minute more.

Add the squash, the coconut milk, the broth, the sugar, the fish or soy sauce, the chili sauce, and the lentils if using. Bring to a boil, reduce to a simmer, cover, and cook until the squash is soft, about 30-40 minutes.

Puree the soup until it’s smooth and velvety. An immersion blender makes this easy (and safe!), but you can also puree the soup in batches in a food processor or blender – be careful! Or you can use a potato masher; the soup won’t be quite as smooth but will still taste delicious. Taste for salt and sweetness and adjust if necessary. Ladle the soup into big bowls, top with a dollop of plain yogurt or sour cream or a squeeze of lime juice, and serve with lots of bread!

(Want to make this in the slow cooker? Easy peasy. I actually wrote about this soup before. This soup also cooks up beautifully ˗ and fast! ˗ in an electric pressure cooker/Instant Pot. Just use the saute function to saute the onions in the oil for a few minutes, until they begin to soften, and then add the minced garlic and curry powder and saute for another minute or two. Add the rest of the ingredients and give everything a good stir, cover, and cook for five minutes at high pressure. Release the pressure manually (natural release is also okay if you forget), puree, and eat!)

butternuts

Confessions of an okra lover, part the first

Okra blossom

Okra/Abelmoschus esculentus Moench. Virginia, August 2012.

My husband says I can get nostalgic about a paperclip, and he’s not far off. Something I’ve been missing like the dickens this summer? Okra. Oh man. It was a star crop for us at our old farm. I never ate it growing up except under great duress, but seven years on Virginia farms turned me into a card carrying okraphile. I guess there are northern varieties (farm and garden friends, please chime in and tell me what they are!!), but we don’t currently grow them at this farm. My husband tells me he’s been seeing some at market – it’s reasonable to ask him to bring me home five pounds next week, don’t you think?

The rest of this post is another that first appeared on our farm blog – hence the references to our being Southern farmers and to a time and place when we grew lots of this little emerald wonder. The recipe at the bottom, for braised okra with cherry tomatoes, is what I would be making this very second if I still had a 200-foot block of okra (or even just a plant or two) a short walk away. It’s dead easy and, more to the point, one of my very favorite things to eat ever. The original post also included recipes for the other things I love to make with okra: lacto-fermented okra pickles, our favorite fried okra, and my husband’s gumbo. I’ll probably bring them on over here too, soon enough.

(Insert Wayne’ World Scooby Doo ending sound here. Boom! It’s two years ago, and you’re sitting on our back porch in Virginia sipping a beer while I finish cooking dinner.)

Confession: we are vegetable farmers, and we are Southern, and until recently I just didn’t like okra very much.  It’s not that I found it offensive exactly. I was always happy enough to eat it in my husband’s gumbo, where, in his deft hands and alongside a rich roux and some smoky spices, its infamous slime is somehow alchemized into a velvety sauce. In a gumbo the okra itself almost disappears, which makes it quite easy to tolerate.  I also tried frying it, over and over again.  It was always okay.  It was certainly pretty to look at, and I felt I must be doing my body a favor by eating it, even if I had to choke it down.  I always felt virtuous eating okra, but I never had very much fun.

With apologies to the many awesome lunch ladies I have known, I am pretty sure the cafeteria at South Columbia Elementary School in Martinez, Georgia, circa 1984, is to blame. I remember dreary piles of the stuff, breaded and steamed and slumping forlornly, almost apologetically, in its compartment of the brownish melamine lunch tray. I looked at its dusty breading and its drab interior, utterly unconvinced, and occasionally gave it a nudge with my fork.  It yielded immediately, like pudding, and slid right back off the fork.  We got off on the wrong foot, okra and me, and I’m afraid now that I wasted more than twenty-five years holding a grudge.

Because this summer?  I’m on an okra bender.  I’m not sure what changed for me, exactly. We’re growing okra again after a hiatus of several years; perhaps I see those gorgeous plants with their flowers like delicate ivory trumpets and I just want to do right by them.  Maybe something clicked for me when my husband said, “I love okra because it’s the most vegetable-y of our vegetables.”  He’s right: when you cook it right, okra’s flavor is green and clean and bright, the very essence of fresh.  Maybe it’s because now, as a mother, I don’t want to waste any more time being virtuous.  What I want is joy at the table, a strong body and a curious mind and an open heart, a rich family life. I swear I’m finding all that in okra.

Some quick notes, and then a recipe.

Storing okra: Keep your okra in a plastic or paper bag in the fridge, unwashed, and use it within a few days.

Using okra: Please don’t bread it and then steam it. You could steam it very gently, just till bright green and still with some snap to it, and then eat it warm, drizzled with butter and a squeeze of lemon juice, or chilled, dressed with a bright vinaigrette.  Try it breaded and fried, braised, pickled, skewered and grilled, in stews, in curries, in place of squash or zucchini in ratatouille.

A word about okra slime: In Vegetarian Cooking for Everyone, Deborah Madison writes, “Okra is slimy, and rather than try to ignore this fact, perhaps it’s best just to admit that’s how things are.” Maybe that’s what changed for me this summer.  I’m not trying to wish the slime away anymore.  Instead, I’ve learned how to make it work in a dish’s favor.  In our favorite fried okra, it binds with a cornmeal and parmesan coating to create a perfect golden crust.  In our okra and tomato braise, it thickens the juices of burst cherry tomatoes and makes the most lovely sauce.  And of course it’s essential for thickening up gumbo.  Maybe thinking about it this way will help you, too.

chooks and okra

Braised Okra with Cherry Tomatoes
(serves 4-6, unless you eat like we do, in which case: serves 2)

This recipe comes to us from our friend and former CSA host Noell. Don’t be fooled by its apparent plainness: this belongs in everyone’s summer arsenal.  It’s amazing eaten straight from the skillet, and pretty darn good eaten straight from the fridge as well.  It’s wonderful on top of quinoa and other grains, and it makes a great wrap or burrito filling.  Every time I take a bite I grin.

Quantities are approximate.  Use roughly equal amounts of okra and cherry tomatoes, and garlic to taste.

1 lb okra
1 lb cherry tomatoes
3-4 cloves garlic (or to taste), chopped
olive oil, salt & pepper

Warm a few tablespoons olive oil in a large skillet over medium-high heat.  Meanwhile, trim off the okra stems and then slice in half lengthwise, or slice into 1/4-inch rounds.  When the skillet is ready, add the okra and the chopped garlic.  Saute for about 10 minutes, flipping occasionally, until the okra begins to brown.  Add the cherry tomatoes, and salt and pepper to taste, and cover.  Braise 5-10 minutes, checking every few minutes.  The dish is done when most of the cherry tomatoes have burst.

Braised okra with cherry tomatoes

Fridge pickles!

Fridge pickles!

Tara mentioned making fridge pickles from a recipe I posted on our farm blog a couple summers ago, and that got me to thinking it makes sense to migrate some of those recipes over here, to this blog that’s not a food blog.

I blogged for our farm, sporadically but earnestly, for four years, and there’s a lot of history there. I’m still not quite sure what to do with it all – it really doesn’t make sense to continue paying for the site. The land that we farmed is becoming something else. We’re not quite sure what, yet, but our story there is (nearly) over. On the other hand: it’s our story! I’m not sure what I want to do with all those pictures and words.

These pickles are part of that story. When it comes to putting food by, what I am is a master dabbler. Sure, I know a heck of a lot more than I did in my city days. I make jam every once in a while, but I freeze it every time. I am always happier when I can dig into lard I made from the fatback of our own pigs instead of reaching for supermarket butter. I do know how to make bacon and yogurt but I only do it sometimes. I think I am fondest of lacto-fermenting vegetables in small batches – it’s quick and easy and delicious and yay for living foods! But beyond freezing bone broth and freezer-friendly produce, none of this is an integral part of our kitchen year.

It’s not that I lack for excellent organic produce (umm…), and it’s not that I lack for inspiration. My kitchen bookshelves are really something to behold, and there are so many great online resources. There are questions of time, of priorities, of honestly assessing how much you can fit into a day, of choosing between sterilizing jars and snuggling up on the couch for another round of George and Martha. But the real stumbling block, for me? I am a big honking extrovert. I play very well with others and get pretty lonesome standing all alone at the stove. I need a class – and, dare I say, homework. I need to blanch the peaches while a mama friend gets the jars ready and our boys stir in the sugar. I need people.

I actually have a lard rendering date next Tuesday! That makes me smile so much I think I might march on down to the old milk room in the lower barn to see if there are any returned cucumbers from yesterday’s market. Cucumbers fresh off the vine are ideal, of course, but the point here is to make something delicious instead of letting something waste. And these fridge pickles? They do the trick.

As I said in the original post on our farm blog, these are a great beginner pickle for the curious-but-intimidated, but they’re also a really tasty way to work through a glut of cucumbers when you don’t have the time or the inclination to can. They are always good.

chooks in the cukes

Fridge Pickles
adapted from Donalyn Ketchum

Crunchy, garlicky, and just sour enough, we can’t stop reaching for these. Pour a simple brine of water, vinegar, and salt over cucumbers, garlic, and herbs. Leave the jars alone for a few days … and voila! Pickles! They aren’t canned, so they need to be stored in the fridge. They’ll keep at least a couple months in there – if they last that long. Makes 6 pints or 3 quarts.

For the brine:
2 quarts water
1 cup white vinegar or apple cider vinegar
1/2 cup canning or pickling salt (kosher salt is also fine, but may result in cloudier pickle brine)

For the pickles:
Cucumbers, enough to fit snugly into your jars, washed well and sliced into spears
Garlic, 1-2 cloves per pint jar or 2-3 cloves per quart jar, smashed and peeled
Herbs (dill is classic; we also love thyme), 1-2 sprigs per pint jar or 2-4 sprigs per quart jar, rinsed well

Clean your jars thoroughly with soap and water. They do not need to be sterilized.

Combine all brine ingredients in a large pot and bring to a boil. Stir occasionally to be sure the salt dissolves completely. While the mixture is coming to a boil, prepare the rest of the ingredients.

Place a smashed garlic clove or two in the bottom of each jar. Add the sprigs of your chosen herb.

Fill the jar the rest of the way with cucumber spears. Really cram them in there – otherwise some spears will float above the brine when you add it, and this can lead to premature spoilage.

Add another smashed garlic clove to each jar – wedge it down between some cucumber spears so it won’t float when you add the brine.

Pour the simmering brine over the vegetables, being sure they are completely submerged. If your brine isn’t simmering, bring it back to a simmer before pouring it over the vegetables.

Put a lid on each jar.

Leave at room temperature for 2-3 days (less time when the weather is very hot, more when it’s cold) and then, if you can stand it, put them in the fridge for an additional 1-2 weeks.

We usually break into the first jar right away but give the rest of the jars the additional slow fridge fermentation before eating them.

Grace in a muffin

In a month – perhaps a bit sooner than that, certainly not much later – we are leaving our farm in central Virginia and moving to a new-to-us farm in New York. We have been farming on our own for seven years now, and when we bought our own land five years ago, we had every intention of staying for the long haul. We built a business and worked our soil and had a baby and picked a lot of tomatoes and had a lot potlucks and really dug our feet in. We love what we built and the vision we had for our life here.

The decision to leave was very, very hard, but I don’t mean to write about that just now. Some months have passed since we decided. Our grief has faded, as it does. Our excitement is mounting, as it will. And in between … well, the devil is in the details, and right this moment? BLLLLLAAAAAAARRRRRRGH!

But I believe there’s grace in a muffin.

Pear chocolate nutmeg muffin


It’s hard, when you’re in the trenches, to act with all the perspective and poise that come so easy when things are … easy. Your fuse is short and your to-do list is a mile long and your worries pile up like so much dirty laundry and who knows when it’s all going to sort itself out? Who knows when things will feel calm again?

I guess these muffins say: “How does right now sound to you?”

Partly it’s that they’re so reliable. So many muffins sit at one extreme or the other: dry and regrettable, or loaded with oil and sugar and heavy enough to prop a door open. These aren’t like that. They’re lovely and toothsome, just sweet enough, with a perfect crumb – owed entirely to the leftover oatmeal, I believe.

But mainly it’s that if you get out your flour and your eggs and your milk and you begin measuring and whisking and stirring and scooping, you pretty much have to stop thinking about your mortgage. (You may have to think about how to get eggshells out of the batter if your kids are with you, but that’s a distraction I highly recommend.)

So maybe it doesn’t have to be muffins. It could be applesauce, or mayonnaise, or a soufflé. Or pie! But for me, this week, it’s muffins.

Leftover Oatmeal Muffins

We make these muffins a lot – two or three times a month. They’ll cater completely to your whim, the season, or the contents of your pantry. We most often use blueberries or mixed berries, frozen, for our extras. Sometimes we add the zest of a lemon too. Other nice combos: toasted fennel seeds plus raisins or currants (plump them first by soaking them in very hot water for about 10 minutes; then drain and add to the batter); dried apricots plus fresh and/or candied ginger; chopped apples plus chopped toasted walnuts; dried cranberries plus chopped toasted almonds plus a little almond extract … be bold! This week I upped the ante and used about a half cup each of frozen mixed berries, coarsely chopped chocolate, and coconut flakes. Yup, that’s more than the cup of extras I suggest below, but I was feeling a little brash – although I was pretty certain those flavors would complement one another nicely. They did. And the muffins were big! My point is, throw in what sounds good.

Also, thanks to Amanda for the original recipe and the heads up about using leftover oatmeal. That’s really where the genius lies in this recipe.

Update 11/2/16: When I first posted this recipe I called for two tablespoons of baking powder. That always seemed a little, hmm, alarming? We continue to make these muffins regularly and I find the leavening amounts in the updated recipe to work well.

1 cup all-purpose flour
1/2 cup whole wheat pastry flour
1 teaspoon baking soda
1/2 teaspoon baking powder
1/2 teaspoon salt
1/2 teaspoon cinnamon (optional)
1 cup cooked oatmeal
1/2 cup buttermilk or milk or milk substitute, room temperature (or gently warmed on the stovetop or in the microwave)
1/3 cup maple syrup, honey, or sugar
1 egg, room temperature if possible (try warming it in a bowl of hot water for a few minutes)
1-2 tablespoons melted lard or butter or coconut oil (other oils would be fine too)
about 1 cup extras

Preheat the oven to 400°F/205°C. Generously grease a 12-cup muffin tin, or use liners.

In a large bowl, whisk together the flours, baking powder, salt, cinnamon if using, and sugar if using. Add oatmeal, milk, maple syrup or honey if using, egg, and lard or butter or oil. Stir until combined but try not to overmix.

(I used to mix the wet ingredients separately and then gently combine them with the dries, and this is probably a good idea if you’re worried about overmixing the batter. But I’m an utter tornado in the kitchen, and for love of my chief washer of dishes I’m trying to use fewer bowls where I can.)

If you have a child who does not like extra stuff in his muffins, scoop one or two muffins’ worth of batter into your tin now. Fold your extras into the remaining batter.

Spoon the batter into the prepared muffin tins, filling each about 3/4 full. I find an ice cream scoop is perfect for this. Bake about 20 minutes, until lightly browned on top. Cool for just a minute or two in the pan and then pop them out and eat them warm, with or without butter, or let them cool on a rack.

Makes 12 muffins.